Flow Mode is Cueboard's fast lane for building a shot list. It is for the moments when you already know what you need to capture and you do not want the app getting in the way.
Tap once, type the cue, press Return, and Cueboard is already waiting for the next idea.
That is the whole point: keep your hands moving, keep your brain in the project, and turn a messy burst of shot ideas into a clean, usable list.
What Flow Mode is for
Most shot lists do not start polished. They start as fragments:
- Opening wide shot
- Close-up of the product
- Cutaway of hands setting up the scene
- Audio note for the voiceover
- B-roll of the final result
Flow Mode is built for that stage. Instead of opening a separate form for every cue, you stay directly inside the project and add one cue after another.
It is especially useful when you are:
- Brainstorming a video before a shoot
- Turning a rough concept into a real production plan
- Capturing ideas during a location scout
- Building a list from a script, outline, or client brief
- Adding missing pickup shots while you are already on set
How to start Flow Mode
On iPhone or iPad, tap the plus button in the project toolbar.
On iPad with a keyboard or on Mac, press ⌘F.
Cueboard scrolls you to the next available spot, opens a new cue, and focuses the title field so you can start typing immediately.
The basic rhythm
Once Flow Mode is active, the workflow is intentionally simple:
- Type the cue title.
- Press Return to save it and move to the next cue.
- Keep typing.
- Tap the checkmark or press ⌘⇧Return when you are done.
Return does not dump you out of editing. It confirms the current cue and keeps the next one ready, which makes Flow Mode feel closer to writing a list than filling out a database.
Switch cue types while you type
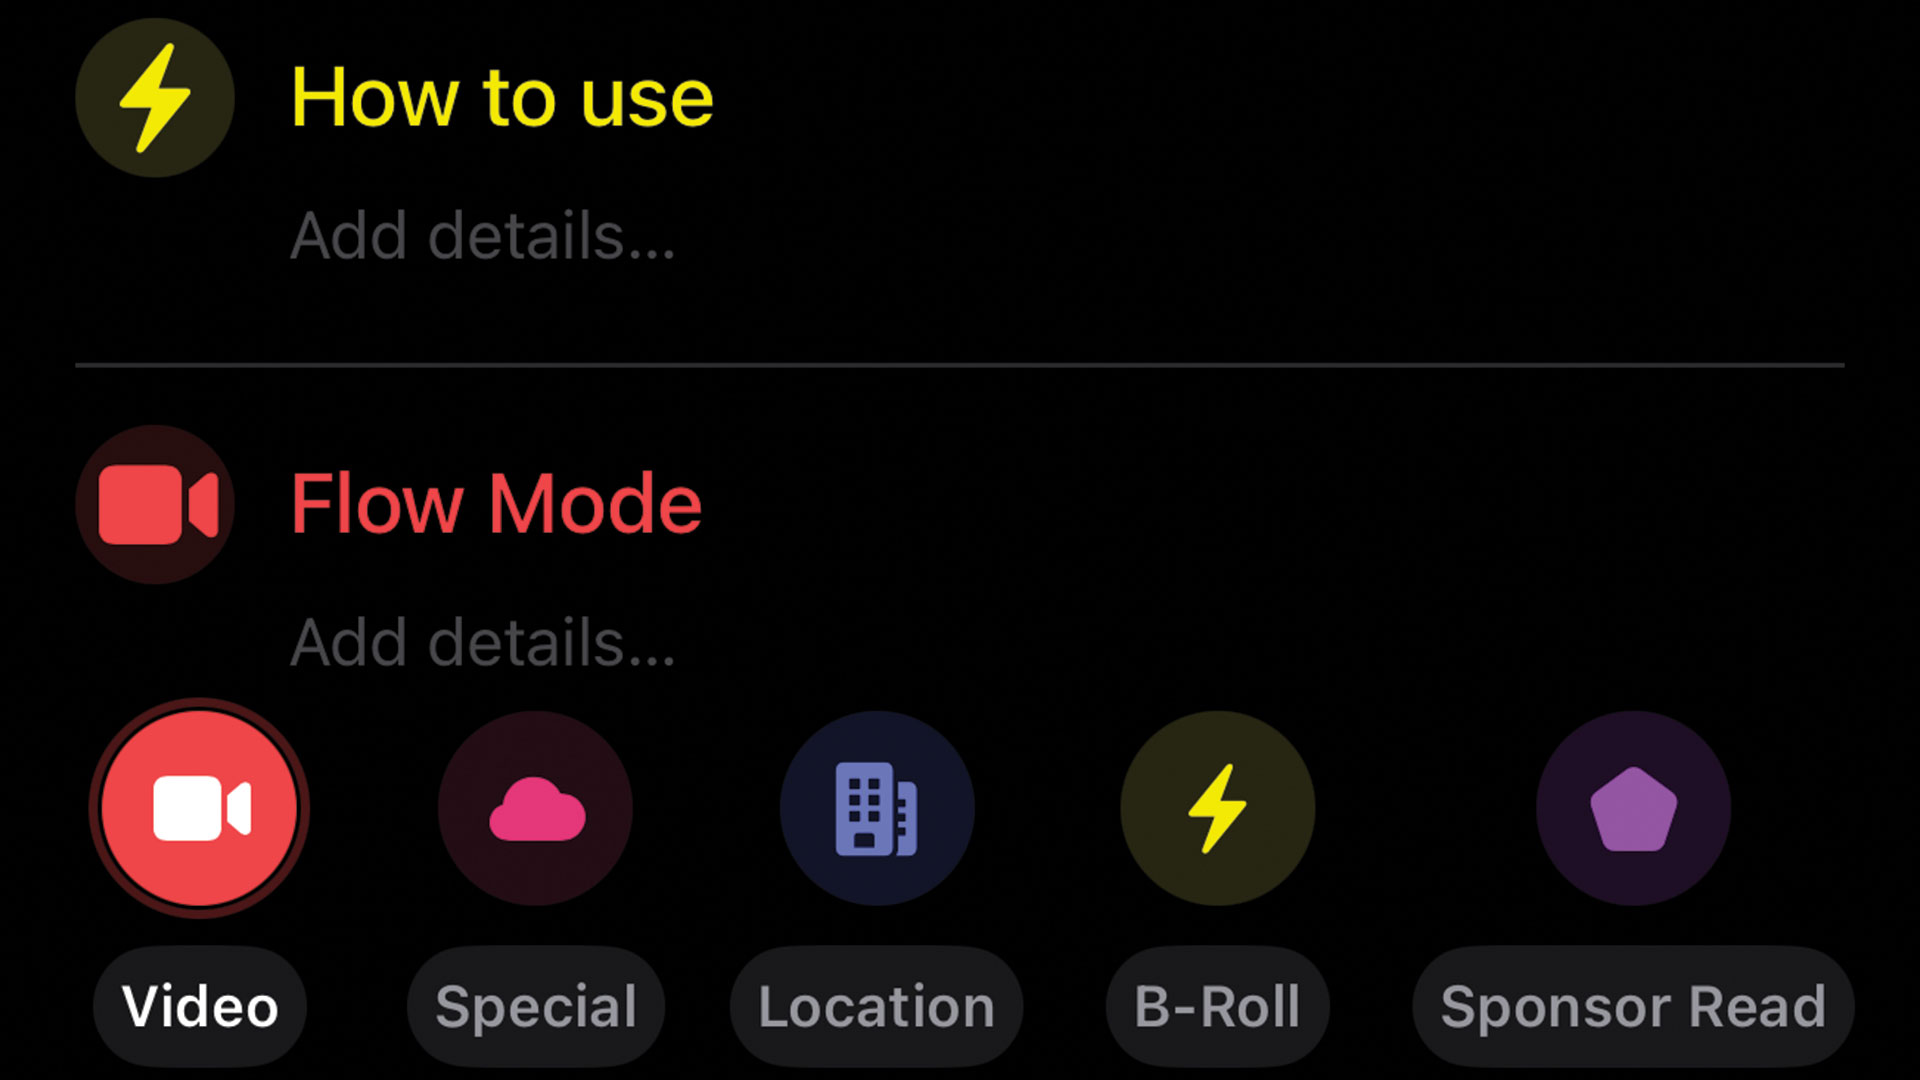
Flow Mode is not only for plain text. Cueboard keeps the cue type picker available while you are editing, so you can mark each idea as the right kind of shot as you go.
Use the cue bar above the keyboard to choose between your visible cue types, including custom cue types you have created in Settings.
If you are using a keyboard, ⌘1 through ⌘9 switch cue types without lifting your hands.
The next cue keeps the type you were just using, which is great when you are entering several similar shots in a row. For example, you can quickly add a run of B-roll ideas, then switch back to video for your main beats.
Add details without leaving the flow
Some cues only need a title. Others need a little more context.
Flow Mode lets you move between title and details fields with Tab and Shift+Tab, so a cue can stay lightweight or become more specific depending on what the moment needs.
Use the details field for things like:
- Lens or framing notes
- Dialogue reminders
- Location context
- Props, products, or setup notes
- Timing reminders for the edit
When you are drafting quickly, the title can carry the idea. When the cue needs clarity, details are right there.
Build subcues when an idea needs structure
Some shots are really mini sequences. Flow Mode supports that too.
While you are in Flow Mode or inline edit mode, press ⌘⇧S to open subcue flow for the current cue. That lets you break a larger idea into smaller beats without losing your place.
For example, a cue called Product demo sequence might become:
- Hero shot of the product on the desk
- Close-up of the main feature
- Over-the-shoulder usage shot
- Reaction shot after the result
- Final beauty shot
That structure matters when a single line is not enough, but a full separate project would be too much.
Why it feels faster than a normal add button
A standard add button asks you to stop, create, save, and repeat.
Flow Mode removes most of that friction. It keeps you inside the project, keeps the keyboard active, and keeps the next cue ready. You are still making a structured shot list, but the experience feels closer to thinking out loud.
That makes it easier to capture the raw material before you start organizing, refining, and checking things off.
A simple Flow Mode workflow
Try this the next time you plan a video:
- Create or open a Cueboard project.
- Start Flow Mode with the plus button or ⌘F.
- Dump every shot idea you can think of.
- Use the cue bar or ⌘1–9 to tag shot types as you go.
- Add details only where they are actually useful.
- Use ⌘⇧S when one cue needs subcues.
- Exit Flow Mode with the checkmark or ⌘⇧Return.
- Reorder, refine, and start shooting.
Do not try to make the first pass perfect. Flow Mode is best when you use it to get everything out of your head first.
The bottom line
Flow Mode is for momentum.
It helps you move from "I have a bunch of ideas" to "I have a usable shot list" without constantly stopping to manage the tool. Whether you are planning a polished client shoot, a YouTube video, a product demo, or a quick run-and-gun project, Flow Mode keeps Cueboard focused on the same thing you are focused on: the next shot.
Ready to try it? Download Cueboard and start your next project in Flow Mode.